Before Installation and Configuration
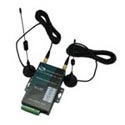
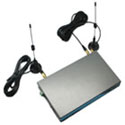
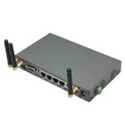
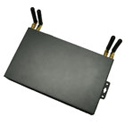
- H750 router has different version. Study your router version before installation.
- For GSM/GPRS/EDGE/HSDPA/HSUPA/HSPA/HSPA+/4G LTE version, please get a SIM card with data business.
- For CDMA2000 EVDO/CDMA1x version, please get a UIM card with data business or inform us before order if the network uses non-ruim (nam-flashing).
- Make sure the sim card or uim card is with enough data business and balance.
- Make sure the signal is good enough where you test or install the router. Weak signal will make the router no work. If you find your signal strength is not good, please contact us for high gain antenna.
Notes: This quick start is for GSM/GPRS/EDGE/HSDPA/HSUPA/HSPA+/TD-SCDMA network only. For EVDO network or CDMA network, please refer to manual or contact us freely.
Step 1) Confirm the sim card if can work with other 2G/3G/4G router or modem. If the sim card can not work, the router will not work correctly.
Step 2) Connect the H750 Router LAN port to a PC via RJ45 cable. Make the PC automatically to get the IP, Submask, DNS.
The PC will get an IP of 192.168.8.xxx.
Step 3) At PC IE browser, please type: http://192.168.8.1
Username: admin Password: admin
Step 4) Internet Settings – WAN – Cell Modem
Notes:
- If you don’t replace any cellular module or not do the “Load Default to factory”, please skip this step and jump to Step 5.
- Please be patient that the router will take some more time to dialup online for first configuration,
At “Cell Modem”, please select “AUTO_DETECT”, and click “Apply” button. The router will automatically detect the module modem.
Step 5) Set Cell SIM1
Setting location: H750 web “Internet Settings – WAN – APN configuration”
Click “Advance Parameter Groups” button, the H750 router will display the configuration page.
Fill in the related parameters. And DO NOT FORGET TO CLICK “Add/Edit” button.
Parameters Groups Name: you can fill in the name freely. But keep No Space between characters.
Dialup: fill in the related parameters. Get this parameter from the Sim Card Provider or Carrier;
APN: fill in the related parameters. Get this parameter from the Sim Card Provider or Carrier;
User: fill in the related parameters. Get this parameter from the Sim Card Provider or Carrier.
Notes: If your SIM card has no user name, please input out default value, otherwise the router may not dialup. Our default value for GSM/WCDMA/LTE is “wap”, and for CDMA/EVDO is “card”.
Password: fill in the related parameters. Get this parameter from the Sim Card Provider or Carrier.
Notes: If your SIM card has no user name, please input out default value, otherwise the router may not dialup. Our default value for GSM/WCDMA/LTE is “wap”, and for CDMA/EVDO is “card”.
Step 6) Set Cell SIM2. Follow Step 6 of setting Cell SIM1.
Step 7) Activate the “Cell SIM Switching Trigger” feature
Setting location: H750 web: Internet Settings – WAN — All Cell Option
There are 6 types of Cell Option Mode (Cell Switching Mode),
| Mode | Description |
| cell1 only | With this mode, only sim1 works |
| cell2 only | With this mode, only sim2 works |
| fail switch cell1 first | With this mode, it works as below, sim1 on – switch to sim2 on if sim1 failed, and keep working on sim2 – switch to sim1 on if sim2 failed, and keep working on sim1 –switch to sim2 on if sim1 failed, and keep working on sim2 – “cycling” |
| fail switch cell2 first | With this mode, it works as below, sim2 on – switch to sim1 on if sim2 failed, and keep working on sim1 – switch to sim2 on if sim1 failed, and keep working on sim2 –switch to sim1 on if sim2 failed, and keep working on sim1 – “cycling” |
| cell1 prefer | With this mode, it works as below, sim1 on – keep working on sim1 – if sim1 failed, switch to sim2 – keep working on sim2 for “Check Time (for Prefer mode)”, then try to check if sim1 is restored, if restored, switch to sim1 – “cycling” |
| cell2 prefer | With this mode, it works as below, sim2 on – keep working on sim2 – if sim1 failed, switch to sim1 – keep working on sim1 for “Check Time (for Prefer mode)”, then try to check if sim2 is restored, if restored, switch to sim2 – “cycling” |
| advance data traffic cell1 first | With this mode, it works as below, sim1 and sim2 have data limits. Sim1 on — once sim1 data count reaches the limitation, switch to sim2 — once sim2 data count reaches the limitation, sim1 and sim2 neither works until next day/week/month.With this mode, users need set the “Advance Cell Traffic” configuration |
| advance data traffic cell2 first | With this mode, it works as below, sim1 and sim2 have data limits. Sim2 on — once sim2 data count reaches the limitation, switch to sim1 — once sim1 data count reaches the limitation, sim1 and sim2 neither works until next day/week/month.With this mode, users need set the “Advance Cell Traffic” configuration. Refer to the detailed manuals from E-Lins. |
| cell on time traffic | Sim1 and sim2 work according the time period schedule settings.
With this mode, users need set the “Advance Cell Traffic” configuration. Refer to the detailed manuals from E-Lins. |
Notes: Sometimes it may happen the following,
1) Choosing ” fail switch cell1 first” or “cell1 prefer”, SIM2 is firstly online, this is not problem because sometimes the SIM1 has some problem to be online.
2) Choosing ” fail switch cell2 first” or “cell2 prefer”, SIM1 is firstly online, this is not problem because sometimes the SIM2 has some problem to be online.
Check Time (for Prefer mode): set the time for “cell1 prefer mode” or “cell2 prefer mode”
Description for Check Time (for Prefer mode):
For example1, Cell Option Mode is “cell1 prefer”, and Check Time (for Prefer mode) is “5” minutes. It works as below,
Router works with sim1 firstly — if sim1 failed, switch to sim2 — keep working on sim2 with 5 minutes — after 5 minutes, check if sim1 is ok, if ok, switch back to sim1.
For example2, Cell Option Mode is “cell2 prefer”, and Check Time (for Prefer mode) is “5” minutes. It works as below,
Router works with sim2 firstly — if sim2 failed, switch to sim1 — keep working on sim1 with 5 minutes — after 5 minutes, check if sim2 is ok, if ok, switch back to sim1.
Step 8) Click “View” button to double check if the settings are correct.
Step 9) Click “Apply” button or Re-power the router to reboot. Then H750 router will reboot and dialup online.
Once it’s online, the CELL LED will light on.
Notes: sometimes the router cannot dialup after the APN configuration, please power off the router, and re-power on it. Because some radio modules need reboot after the initial APN configuration.
Step 10) Once H750 router is online, it gets a WAN IP Address and Status Page will show similar info.
Step 11) Activate the “Cell ICMP Check” feature
Setting location: H750 web: Internet Settings – Cell ICMP Check
Notes:
1) For router working with best stability, we highly suggest activate and use this feature.
With this feature, the Router will automatically detect its working status and fix the problem.
2) Please disable the “Ping from WAN Filter” if use ICMP check feature, otherwise it cannot work.
- Active: tick it to enable ICMP check feature
- Check method: fill in checking domain name or IP. Click HOST/IP check button to verify before using it.
- Check interval time (sec): set the interval time of every check
- Check Count: set the checking count number
- Reboot Count Before Sleep: H750 Router will sleep to stop checking after failed with set times.
- Sleep Time (min): H750 Router sleep timing before resume check.
Example with above picture:
H750 Router check “www.google.com” and “112.134.8.8”, it will check 3 times. After the previous check, it will do next check after 60 seconds. Totally it will check 3 times. If 3 times all failed, H750 Router will reboot. If reboots 3 times continuously, H750 Router goes to sleep to stop checking. The sleep time is 5 minutes. After 5 minutes, H750 Router resumes to cycle the checking.


